Domestic Sewing Machine
Choosing a home sewing machine for dressmaking - mechanical vs computerised, which features matter, essential feet, threading and tension basics, and the cleaning routine that fixes most stitching problems.
Published · Updated

A domestic (home) sewing machine is a general-purpose machine. It sews straight stitch and zigzag, usually buttonholes and a range of utility and decorative stitches, at moderate speeds, in a portable body that sits on a table. That versatility is exactly what garment sewing at home needs. An industrial machine is faster and tougher but does one stitch, and an overlocker finishes edges but can't do most construction.
Mechanical or computerised
- Mechanical machines set stitch length, width and type with dials. They're simple, durable and repairable, and usually less expensive. A good mechanical machine with straight stitch, zigzag, and a four-step buttonhole is enough for almost all dressmaking.
- Computerised machines select stitches with buttons and a screen. They offer one-step buttonholes in several styles, precise needle positions, needle up/down settings, speed control, automatic thread cutting, and often hundreds of stitches. They're convenient, but more expensive to repair, and most of the decorative stitches go unused in garment sewing.
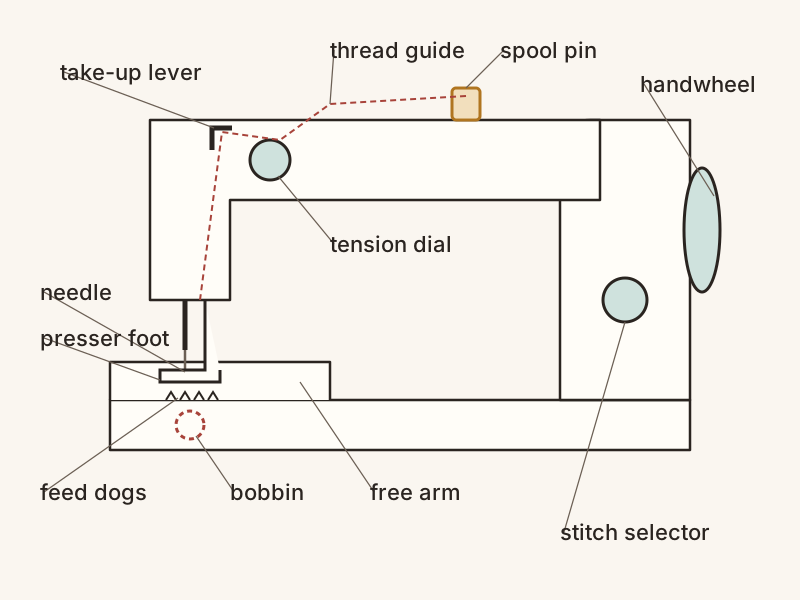
Features that matter for dressmaking
In rough order of importance:
- A reliable straight stitch with adjustable length. Everything else depends on this.
- Zigzag with adjustable width, for finishing seams and sewing knits.
- A good buttonhole, preferably one-step with a button-sizing foot. Test one on thick and thin fabrics before buying if you can. See Buttonhole.
- Adjustable needle position, for edgestitching and inserting zippers.
- A free arm: the bed narrows so sleeves, cuffs and trouser legs slip around it.
- A stretch stitch for knits (see Knit Fabrics).
- Presser foot pressure adjustment, useful for knits and thick or slippery fabrics.
- A metal internal frame and a strong motor, which help with denim and heavier fabrics.
- Needle up/down and speed control, which help with precision and confidence.
Buy from a dealer who services what they sell, if you can, and try the machine on your own fabrics. A good-quality second-hand mechanical machine that's been serviced is often a better buy than a new budget machine.
Presser feet worth having
Most machines come with a general-purpose foot, a zipper foot and a buttonhole foot. Useful additions:
- Invisible zipper foot, for invisible zips. See Zipper Insertion.
- Edgestitch foot, with a guide blade, for precise topstitching.
- Walking foot (even-feed foot), which feeds the top layer at the same rate as the bottom. Good for knits, stripes, plaids, velvet and thick layers.
- Rolled hem foot, for narrow hems on fine fabrics.
- Teflon or roller foot, for vinyl, leather and laminated fabrics that stick.
- Straight-stitch needle plate, for fine fabrics that get pushed into the zigzag plate's wide opening.
Threading and tension
Most stitching problems come from threading, not from the machine:
- Thread with the presser foot up. This opens the tension discs so the thread seats between them. Threaded with the foot down, the thread bypasses the tension and loops under the fabric.
- Hold the thread as you take the first two stitches, or the thread can be pulled down into the bobbin area and tangle.
- Insert the bobbin the way the manual shows. On many drop-in bobbins, the thread unwinds counter-clockwise.
- Balanced tension means the top and bobbin threads lock in the middle of the fabric layers. Loops on the underside mean the top tension is too loose, or the machine is threaded wrong. Loops on top mean the top tension is too tight, or the bobbin is threaded wrong. Rethread completely before touching the tension dial.
Needles
Use the right needle for the fabric, and change it every project or after about 8 hours of sewing. A blunt or bent needle causes skipped stitches, snags and a thudding sound. The Needle, Thread & Stitch Length Chart lists needle types and sizes by fabric.
Cleaning and maintenance
Lint from fabric and thread builds up under the needle plate and around the bobbin case surprisingly quickly, and it causes skipped stitches, noise and tension problems. A simple routine:
- After every project or so, remove the needle plate and bobbin case, brush out lint with the small brush supplied, and wipe the area. Avoid canned air, which blows lint deeper into the machine.
- Oil the machine only where and as often as the manual says. Many modern machines need little or no oiling by the owner.
- Change the needle.
- Have it serviced every year or two, or if the timing seems off (the needle hits the plate, or stitching fails even when correctly threaded).
When a machine starts misbehaving, go through the basics in order before assuming it's broken: rethread top and bobbin, change the needle, clean out the lint, then check the tension. That sequence fixes most problems.